
The Seed Stitch Hat
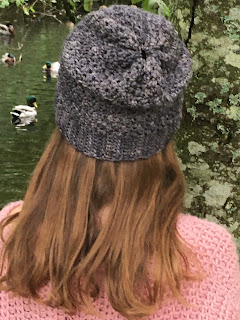
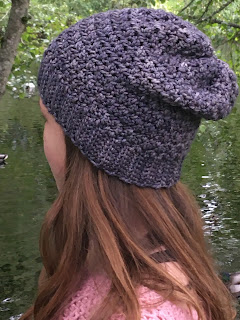

The next pattern using the seed stitch, a gorgeous winter hat, also known as a toque here in Canada. It’s still fairly cold here, so this will still get lots of use before the warm weather finally approaches. This is the perfect project to whip up in an hour or two and the end results are absolutely gorgeous.
Thank you so much to less traveled yarns for providing the yarn to make a sample, all thoughts and opinions are completely my own.
Less traveled yarns is a hand-dyed yarn shop, all of their gorgeous yarns are hand-dyed in Pheonix, Arizona. There are so many beautiful colours to choose from, I made my sample using the colour Obsidian and the Worsted base. The yarn was so soft, and the fabric was stretchy. You can check out all the amazing yarns they have here.
Materials:
#4 Worsted Weight Yarn I used Less Traveled Yarn's Worsted and WeCrochet's Swish Worsted
5.5 mm crochet hook (or size required to meet gauge)
Yarn Needle
Scissors
Faux Fur Pompom (optional)
Gauge:
13 rows x 16 sts = 4” in Sc in BLO
Sizing Info:
The pattern is written as baby(toddler, child, adult small, adult large)
Abbreviations:
Ch: Chain
R: Row
St(s): Stitch(es)
<>: The number(s) between < and > show how many stitches you should have at the end of a row
BLO: Back Loops Only
Dc: Double Crochet
Pattern:
Ribbing:
Ch 9
R1: Starting in 2nd Ch from hook, Sc in each ch across, Ch 1, turn <8 sts>
R2-46(52, 58, 64, 72): In BLO, Sc in each st across, Ch 1, turn
Try wrapping the ribbing around the future wearer’s head to make sure it fits, if not adjust it by adding or unraveling rows.
Hat:
R1: (Along the long side of the ribbing) Dc, Sc, Repeat across, Ch 1, turn <46(52, 58, 54, 72)> (You should have the same number of stitches as you had rows for the ribbing)
R2-12(16, 20, 22, 26): *Dc in next st, sc in next st* Repeat across, Ch 1, turn
Make sure the hat is the right length, if it’s not add or subtract rows.
Fasten off, leave a tail for sewing
Finishing:
Stitch together the two shorter sides of the hat, to make a tube, fasten off. Straight stitch around the top of the hat (the side without the ribbing), once you reach the end, don’t fasten off, pull tight, this will create the hat shape, fasten off, weave in the ends.
If you want to add a pompom, do so at this point most faux fur pompoms should come with instructions for putting them on hats.
Congratulations, you finished your hat! If you’re interested in seeing more of my work or testing for me in the future, follow me on Instagram @lilyscutecrochet or join my ravelry group Pattern Testing for Lily's Cute Crochet
© Copyright 2020 Lily Oger, All Rights Reserved. All designs, posts, videos and images are property of Lily Oger. No parts may be reproduced, altered, or distributed in any form, or by any means, without express written permission from Lily Oger. You are welcome to sell finished items made from the pattern, but please use your own photos and give credit to Lily’s Cute Crochet or www.lilyscutecrochet.ca

Comments
Post a Comment
Your response has been recorded it will appear shortly